| DIY OZONE CLOSET |
by Eric Hall
In a previous article, I noted that I would discuss how I built my DIY ozone closet in my garage. This build was again a straightforward build and one of necessity as I didn’t have room for a commercially built ozone closet and I wanted to hang my clothes rather than store them in a tote.
I began by taking one section of my lockers and dedicating it to my ozone closet. There is a top shelf that is 18 inches high at the top of the locker that is open storage and not included in the ozone area. This gave me roughly two foot wide by six and a half foot tall OZONE locker area that is 12 inches deep. I would have preferred a deeper locker but had to make do with the dimensions that I had already set up.
 |
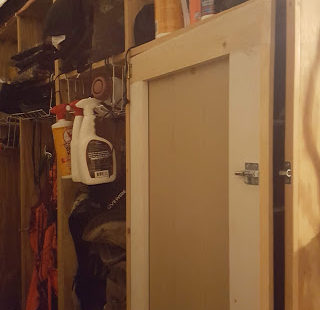
| Door Locked and Electronics |
I added a 1/2 inch by 1/2 inch door stop around the perimeter of the locker inset one inch to allow for the door to sit flush with the outside of the lockers. The door stop was cut from pine boards and nailed into place. Garage door weather stripping was cut and added to the door stop with staples to help seal the door to keep the ozone in the locker and on my gear longer.
I built the door frame out of 1×4 boards. I attached the rails to the stiles with pocket screws adding a board across the middle to help with rigidity. The backing was made from T1-11 siding that I had laying around. I cut the backing to fit the outside dimensions of the door frame attaching it with glue and finish nails to the back of the frame. The door is attached to the locker with hinges on the left and barrel bolts on the right allowing the locker door to easily open and lock in the closed position.
 |
| Large OZONE unit on the shelf |
Now that I had the door built, I began to work on the interior of the closet. I cut a wire rack to serve as a shelf in the locker. I wanted the ozone to be able to fall below the shelf to reach other gear and the wire rack served the purpose well. The shelf sits 12 inches from the top of the door opening of the locker on top of 1×3 boards attached to the locker sides with pocket screws. The back of the locker is only 1/4 inch plywood so I screwed into the sides of the locker to add the shelf support. Hooks were added to the shelf support board to hang clothing items. I also added hooks on the sides of the locker and on the door to accommodate more clothing items hanging within the locker.
 |
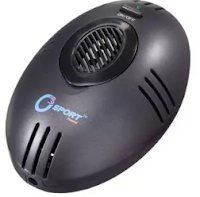
| ScentPurge 50 |
The ozone unit is straightforward as well. For the 2017 season, I used a Whitetail’R ScentPURGE 50 ozone unit ($50 dollars) that I attached to the top of the locker. I drilled a hole in the side of the locker to feed the power cable used to run the unit and sealed it with silicone. Because ozone is heavier than air, the ozone unit needs to be at the top of the locker allowing the ozone to fall down over all the gear.
 |
| Timer Unit |
I purchased a timer unit for $12. You can find the same Sylvania timer for $12.99 on Amazon. The timer allows me to turn the ozone on for a prescribed amount of time up to 60 minutes. You can also just power on the unit and let it run continuously if needed. I used double gang electrical box, placing the timer on one side and a standard 15 amp electrical outlet on the other. The timer is hard-wired to an orange extension cord for power and used as a switch for the electrical outlet. The power cord from the ozone machine plugs directly into the outlet side of the unit. The timer/outlet box is mounted to the outside of the locker and the cord is run to an outlet in the garage to power the unit.
 |
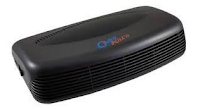
| ScentPurge 270 |
In 2018, I have upgraded my ozone unit to the ScentPURGE 270. I found that the smaller unit took longer to “clean” when the locker got full during late season. I plan to deploy the ScentPURGE 270 unit at the top of the locker and the ScentPURGE 50 near the bottom to sanitize my backpack and seat cushions that sit in the bottom of the locker.
Overall, I like the ozone closet. I find that it is easy to find my gear in the early morning hours. The ozone cleans the gear well. I hunted all of 2017 without being busted by downwind deer. I am looking forward to seeing how the tweaks I made this offseason impact the hunt in 2018. If you are looking for an affordable ozone solution, try building a locker of your own.


